SERGUI - an overview

Open a new terminal window, and type:
- sergui
- A window will open, requesting your name and contact information...used for creating directory-tree information for data collections (eg. Institution_PI)
- After you have filled out that information, and clicked the "OK" button, several windows will open automatically, including:
- the My Pucks window; indicates the names and locations of loaded pucks
- two Adxv windows; used for visualizing your diffraction image(s)
- a Staff_Update window; contains potentially useful information and updates
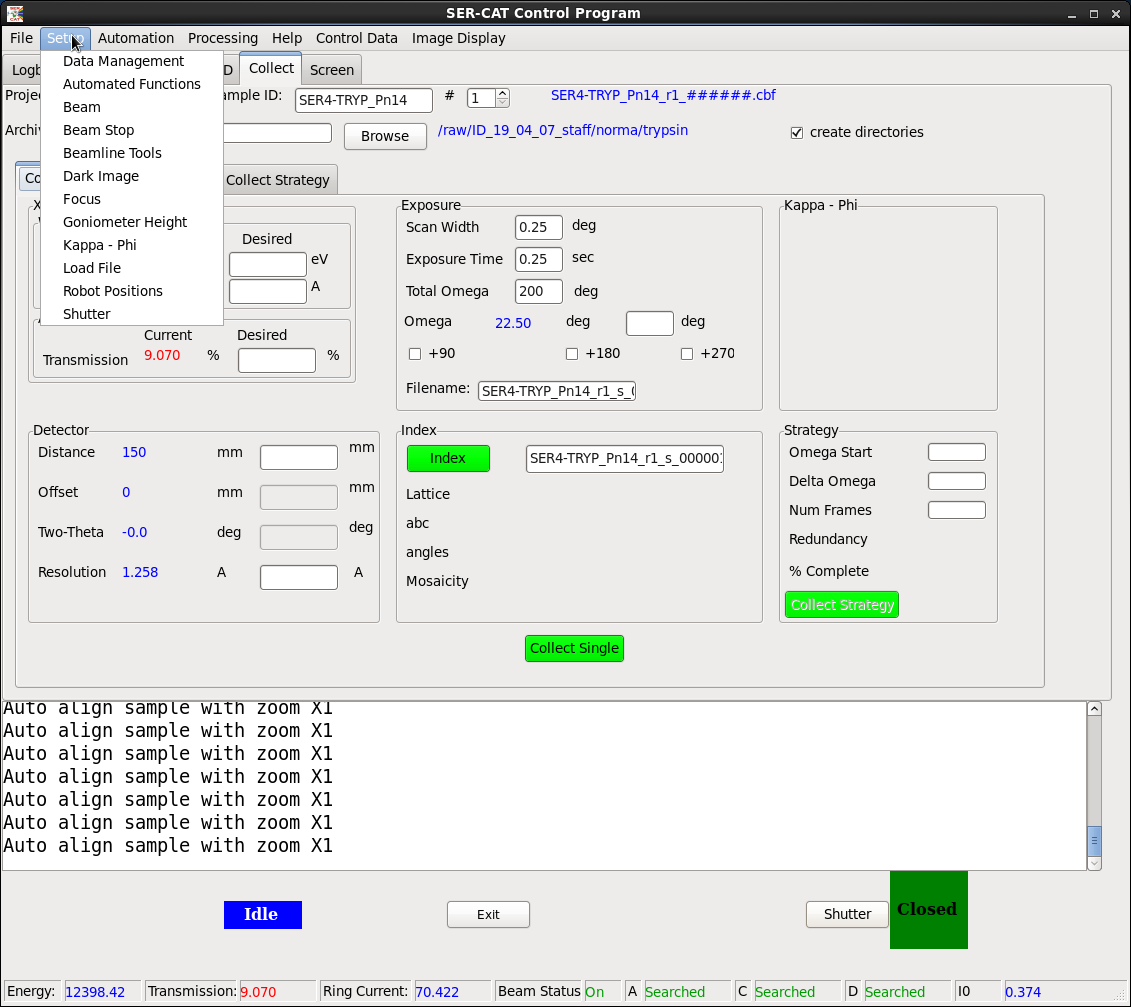
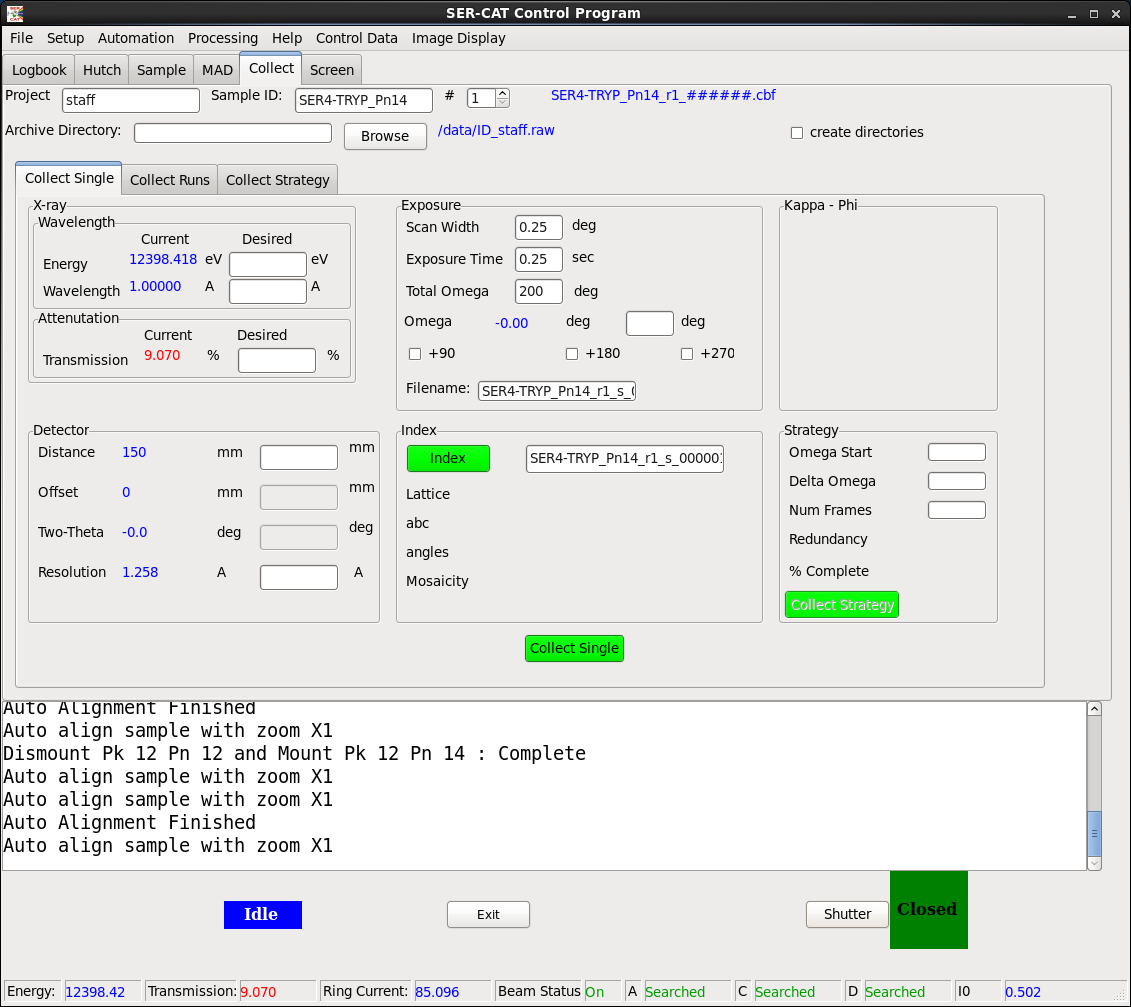
- the SER-CAT Control Program window, composed of 6 tabs:
- Logbook (default location)
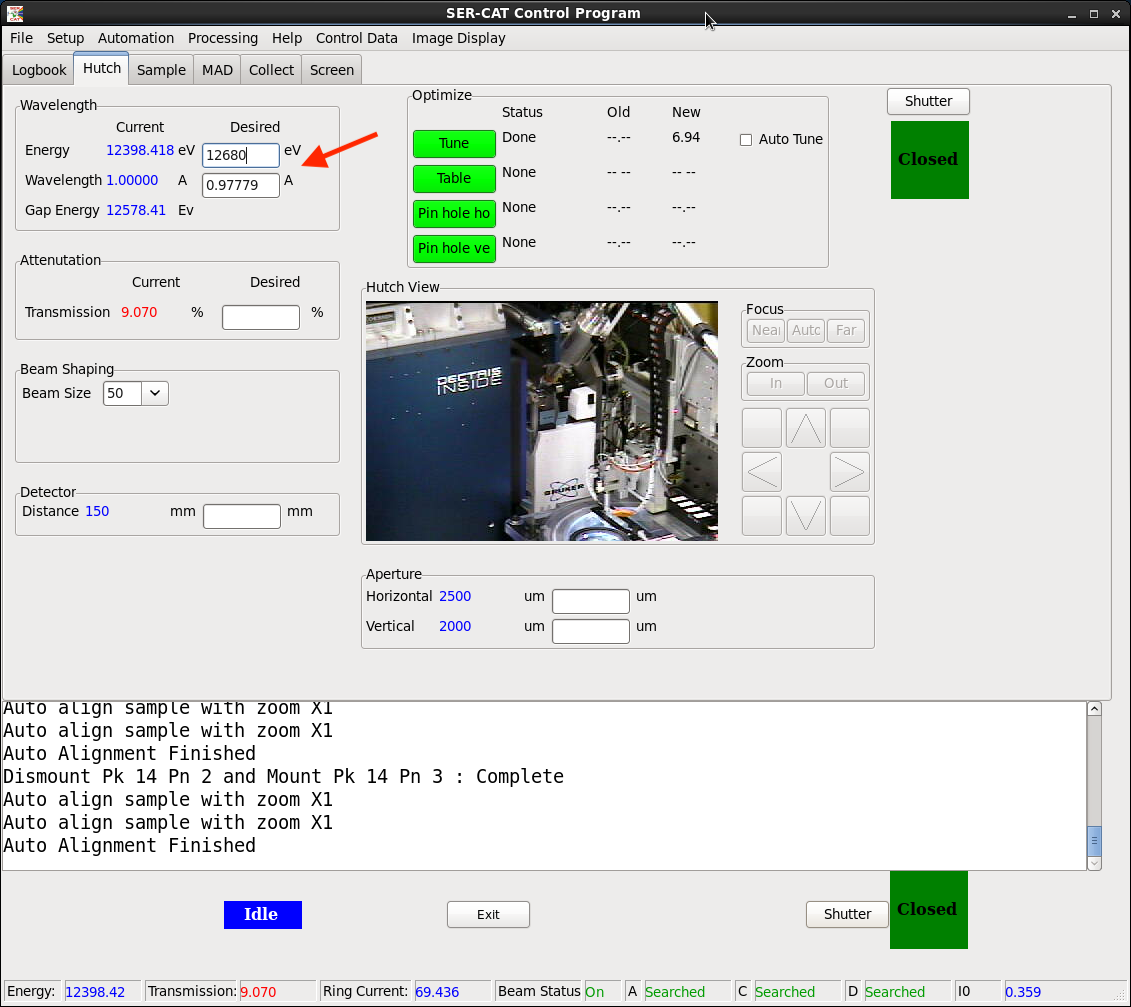
- Hutch (image of 22-ID-D)
- Sample
- MAD
- Collect: composed of three sub-tabs - Collect Single, Collect Runs, Collect Strategy
- Screen
- In addition, there are 7 pull down menus, available at all times, located above the tabs:
Data Collection Protocols

Data collection directories:
A User may choose to use one of several pre-defined protocols for their data collection strategy. Using one of these can make subsequent data collection more organized, and help prevent accidental over-writing of previously collected images.
If desired, a User may choose instead to import and load an excel spreadsheet containing sample information, then use this information as part of the hierarchical naming scheme for data collection and processing. This is most easily accomplished by creating an excel spreadsheet, which has been tab delimited, then saved this file as filename.csv.
Should the User choose to not load a previously prepared spreadsheet or pre-defined protocol, the default hierarchical naming convention will be: puck name, pin number, single/run number (eg. Pn8p3s1 for "puck number" 8, "pin" 3, "single" image number 1).
Changing Energies

SER-CAT beamline 22-ID-D will usually be set to 1.00 Å wavelength for the beginning of your time-slot, but both MAD and SAD experiments often require changes of this parameter. The method for accomplishing a wavelength change on 22-ID-D is given below:
- 22-ID-D:
- one may enter desired energy in eV (note: NOT keV!) - OR...
- one may enter desired energy in wavelength (lambda, measured in Å)
- note that the undulator gap energy will be slightly higher in eV than the desired energy; this is normal, and is a function of APS calibration considerations
- 22-ID-E:
- this will be a "fixed wavelength" beamline, delivering 12,700 eV x-rays
- note that the undulator gap energy will be slightly higher in eV than the desired energy; this is normal, and is a function of APS calibration considerations
Beamline Tools

Accessed by the robot are certain beamline tools:
- YAG Crystal or Phosphor:
- on either 22-ID-D or 22-ID-E, YAG crystal will be preferrable for aligning your beam (mounted on same stage as crystal alignment slides); in principal, phosphor could also work, and one will be available
- on both 22-ID-D and 22-ID-E, phosphor is first step towards verifying that goniometer height coincides with cross-hairs (and is aligned with x-ray beam)
- Alignment pin: used to ascertain "point and click", "goniometer rotation axis"
- a sharp-pointed pin, available for "point and click" verification
- successful alignment of tip at all goniometer orientations verifies goniometer rotation axis coincides with cross-hairs (used for "point and click", as well as alignment of x-ray beam position)
- Trypsin crystal (standard; primitive orthorhombic, space group P212121)
- though this crystal may appear icy towards the end of the run, it will continue to diffract well and provide an in-house standard for beamline verification
Robot Automounter

Both beamline 22-ID-D and 22-ID-E will be equipped with a robotic sample mounter:
- 22-ID-D:
- MD-3 vertical omega axis diffractometer (delivered)
- up to xyz Uni-pucks, all pin positions accessible (new auto-mounter presently being assembled)
- Dectris Eiger 16M detector (proposal being written for new Dectris Eiger detector)
- 22-ID-E
- MD-2 horizontal omega axis diffractometer (proposal being written for new MD-3 diffractometer)
- with MD-2, up to 20 Uni-pucks; all pin positions accessible
- with MD-2, up to additional 10 Uni-pucks; pin positions 6, 15 and 16 inaccessible
- Rayonix Fast CCD detector (prosal being written for new Dectris Eiger detector)
Collecting Data

Set-up occurs in a series of steps:
- Mounting and aligning crystals:
- SER-CAT staff member loading pucks into beamline dewar(s)
- User choice of puck/pin from available pucks
- Auto-loop alignmenmt of sample
- 2-point crystal alignment; point and click
- Manual alignment; point and click
- Fluorescence scans
- Mount a poor-quality crystal from your project
- Take a "single" diffraction image, to make sure crystal is centered in x-ray beam
- Run a scan with low transmission to avoid detector saturation
- Click on "Analyze", to analyze the scan
- Data collection setup; single pass
- Collect single images in different orientations under the "Collect Single" tab
- Set up and upload data collection parameters under the "Collect Strategy" tab
- Start data collection under "Collect Runs" tab
- Data collection setup; MAD
- Collect single images in different orientations under "Collect Single" tab
- Set up data collection parameters under the "Collect Strategy" tab
- Enter/check the peak, edge and remote energies from the fluorescence scan
- Upload the parameters and collect data sets under "Collect Runs" tab
- Rastering
- Center the loop and click on Automation -> Sample Rastering on "sergui"
- Click "Yes" to the pop-up window, requesting: "Do you want to open the help PDF for rastering?"
- Follow the instructions in the PDF for sample rastering
- Helical data collections
- Center the crystal and click on Automation -> Helical Data Collection on "sergui"
- Click "Yes" to the pop-up window, requesting: "Do you want to open the help PDF for helical data collection?"
- Follow instructions in the PDF for helical data collection
- The most recent and reliable direct beam information is obtained by typing:
- ssbeamxy aps22idd (or: ssbeamxy aps22ide); this will return a list of the following:
- Definitions of various different detectors
- Directbeam coordinates, as required for various processing packages
- Command-line User Input commands for quick and automatic data processing when using SER-CAT computer systems
- Also, the relevant direct beam information for your data collections (along with a great deal of other useful information) will be automatically be saved for you in the following location(s):
- /data/IDD_name_institution.raw/beamcenter_22IDD.dat (or analogous gzipped file)
- /data/IDE_name_institution.raw/beamcenter_22IDE.dat (or analogous gzipped file)
- ssbeamxy aps22idd (or: ssbeamxy aps22ide); this will return a list of the following:
Frequently Asked Questions (FAQ)

A certain number of questions tend to arise frequently; you might be able to find your answer below:
- Useful Reminders are included in this pdf, including answers to:
- I started a data collection and I see blank images with no diffraction
- APS stored beam was lost and it just came back; what should I do?
- I can not see my sample
- I am not able to open the "sergui" program
- I collected some data sets and I would like to quickly look at auto-processing results
- Where can I find the beam center values?
- I sent too many samples and have lost track of which crystals I have already mounted; do you have that information somewhere?
- My NX-client fails to connect to the SER-CAT computers
